Products > Car Imaging > ImageCutter30-CD


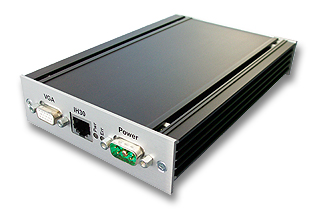
In order to put images to an integrated dashboard display, the Nickl ImageCutter30-CD tailores the image geometries and timings to fit the needs of the dashboard display. This signal can then be put to the display interface via the Nickl ImageHub30 which is especially adapted to the target vehicle. The image can be zoomed, shrinked cropped or expanded to the target resolution. For example, a PC signal of 1024 x 768 dots can be cropped to 800x480 dots thus achieving a pixel-by-pixel mapping.

The tailored signal is routed via a standard Ethernet patch cable from the ImageCutter30-CD to the ImageHub30. This is done via AC coupling technique allowing DC isolation of the ground nodes.

The Nickl ImageCutter30-CD is housed in a robust aluminium case.
Particular features
  • Generates output timing for dashboard display
  • Multiplexing between original image and PC/Video image
  • DC De-coupling of ImageHub30 and ImageCutter30
Applications
  • Research and development of automotive applications with 12V or 24V DC-Bordnetzen
Order Data: 1EMIC30-CD

Documentation: Data Sheet
Tool for configuration: VTI tool

Installation guidelines VTI tool

To configure the ImageHub30 for a specific type of car, follow the steps below:


  1. Make sure that the ImageHub30 is connected to the ImageCutter30 and that the ImageCutter is provided with power supply.

  2. Connect the RS-232 interface of the ImageCutter30 with the RS-232 port of your PC.

  3. Download and extract the files of the Zip-Archive and start the configuration tool VtiConfig.exe

  4. Under Communication, select the COM port where the ImageCutter30 is connected to

  5. Download the configuration file for the appropriate type of car. Please make sure that you have the fitting variant of ImageHub30. The configuration file can be found in the car-specific description, which is listed in the compatibility list.

  6. Load the configuration file with the Load/Save button

  7. At the Communication tab, press the Button Write to VTI.


For more information to the VtiConfig tool, read the Manual of the VtiConfig tool which can be found in the Zip-Archive.